ShopDreamUp AI ArtDreamUp
Deviation Actions


Suggested Deviants


Suggested Collections


You Might Like…


Description
I use a particular process for these paintings. In the past, I have tried and failed to "eyeball" proportions, so nowadays I use large paper printouts (11x17) and carbon paper. I suppose I could use a grid, but that involves using math to figure out the size ratio or whatever. I hate math.
Tracing the contours of the subject is kind of a cheat, but it's really only useful for laying out proportions. Once you start laying down the paint, the tracing is obliterated. It's really only useful to make "colouring book" type images - blocky outlines for outlining main masses. It doesn't work for fine details, or graduated shadows.
Once I trace the outline of the subject onto the canvas, I do the underpainting - a thinned-out layer of the base colors I will be using. Apparently some folks cover the whole canvas in one color, but I prefer to do a "paint by numbers" kind of sketch with flat patches of base colors.
I usually make 2 or 3 copies of the printout. One is my "tracer," which gets pretty much ruined after I use it. The second one, I keep clipped to a back board on my easel for a constant visual reference. Sometimes, I will cut pieces out of this print (faces, hands, any part with really exact details) and fix them directly to the canvas with pushpins so I have my source image very close to the area I'm working on. The third copy is my backup full-image reference in case I do need to cut one of them up.
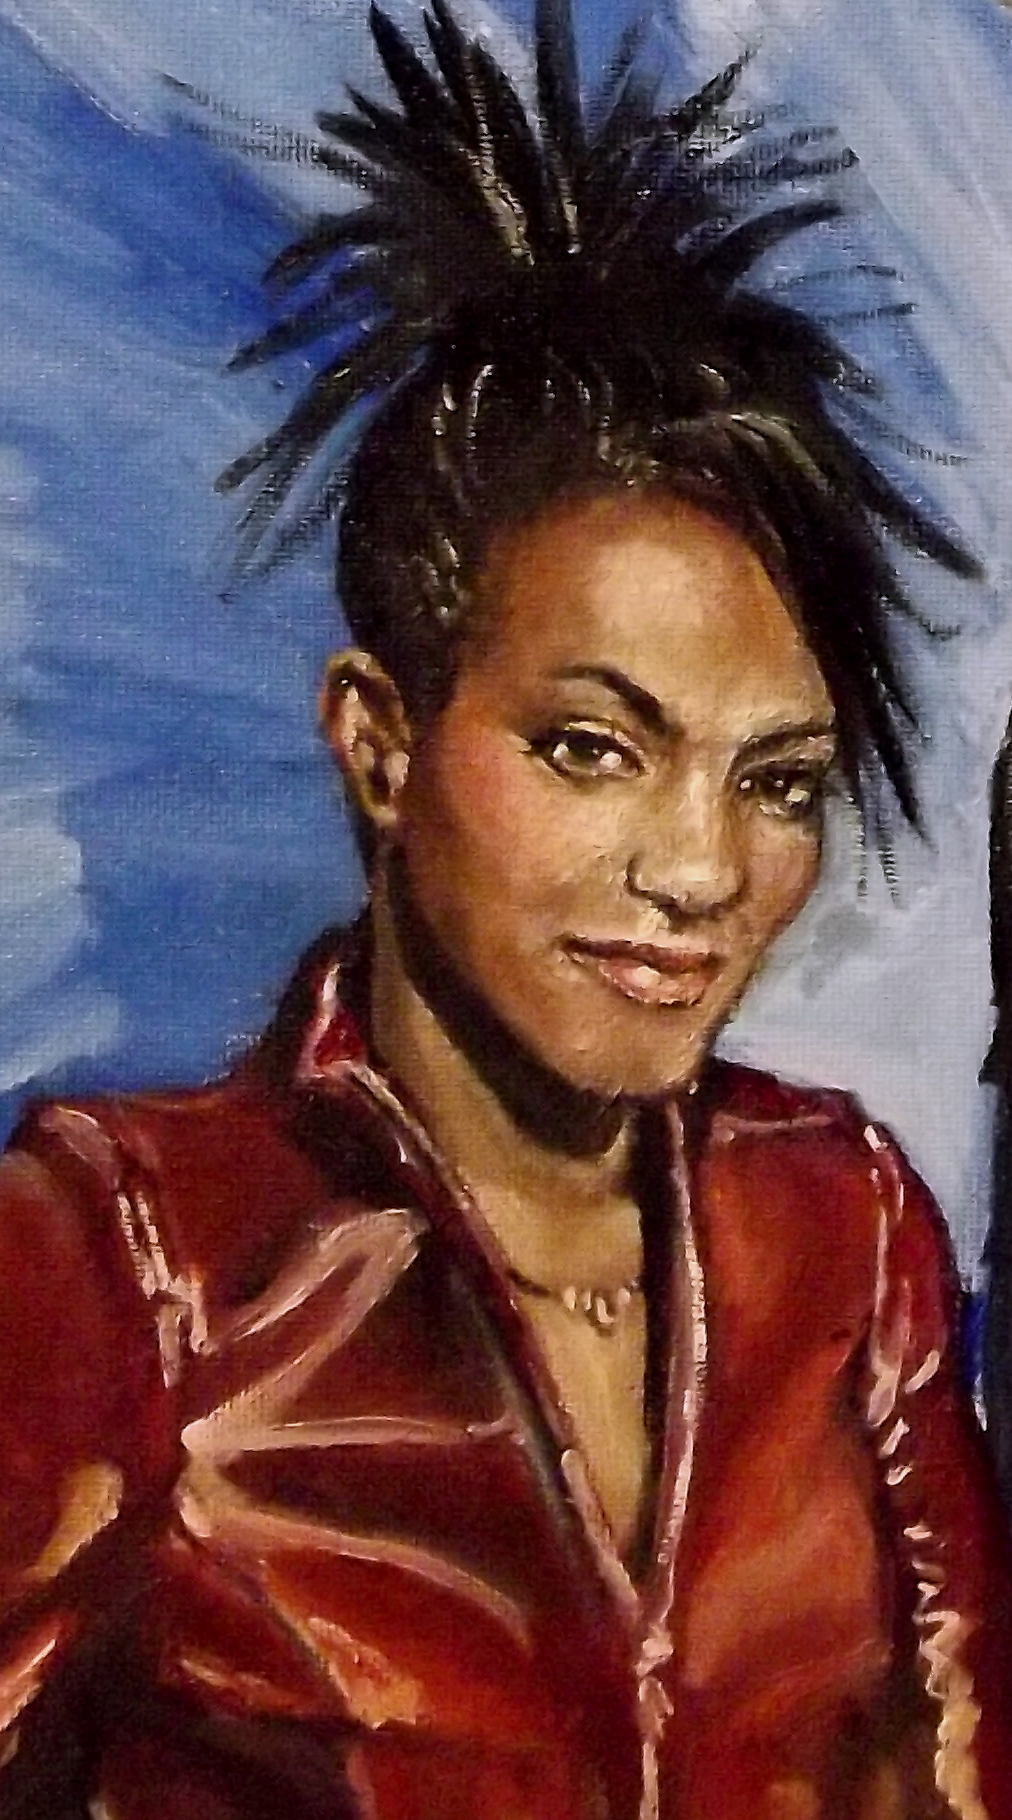
From the next step, I layer on the details. I will usually work on a single element at a time - in this painting, for example, I did the Doctor's face first, then his jacket, then the TARDIS, then Martha's jacket, and her face last. Probably not ideal, but it works for me.
In this particular painting, I had a difficult time getting her face right. For that, I used GIMP. I used the original image as a base layer, then took pictures of her face as I worked on it and pasted them on top as new layers, scaled and rotated to match exactly. I set the eraser tool to about half opacity, scaled the brush up huge and partially erased the pasted layer. This allows me to see the dark details of the base image underneath, and to determine where my painting needs more work.
In the Layers window, you can toggle the pasted layer visible/invisible - I did this over and over to better see what needs work. If something is off, it looks like movement, and this can be a better indicator than semi-transparent layers.
I had to do this several times to get it to this stage - I would snap a picture, download it and layer it for comparison, make more changes, snap another picture, etc. Hopefully, people familiar with the actress's face will now be able to recognize her in the painting. I'm satisfied with it myself - partly because I know that if I do anything else to it, I will only ruin it.
Tracing the contours of the subject is kind of a cheat, but it's really only useful for laying out proportions. Once you start laying down the paint, the tracing is obliterated. It's really only useful to make "colouring book" type images - blocky outlines for outlining main masses. It doesn't work for fine details, or graduated shadows.
Once I trace the outline of the subject onto the canvas, I do the underpainting - a thinned-out layer of the base colors I will be using. Apparently some folks cover the whole canvas in one color, but I prefer to do a "paint by numbers" kind of sketch with flat patches of base colors.
I usually make 2 or 3 copies of the printout. One is my "tracer," which gets pretty much ruined after I use it. The second one, I keep clipped to a back board on my easel for a constant visual reference. Sometimes, I will cut pieces out of this print (faces, hands, any part with really exact details) and fix them directly to the canvas with pushpins so I have my source image very close to the area I'm working on. The third copy is my backup full-image reference in case I do need to cut one of them up.
From the next step, I layer on the details. I will usually work on a single element at a time - in this painting, for example, I did the Doctor's face first, then his jacket, then the TARDIS, then Martha's jacket, and her face last. Probably not ideal, but it works for me.
In this particular painting, I had a difficult time getting her face right. For that, I used GIMP. I used the original image as a base layer, then took pictures of her face as I worked on it and pasted them on top as new layers, scaled and rotated to match exactly. I set the eraser tool to about half opacity, scaled the brush up huge and partially erased the pasted layer. This allows me to see the dark details of the base image underneath, and to determine where my painting needs more work.
In the Layers window, you can toggle the pasted layer visible/invisible - I did this over and over to better see what needs work. If something is off, it looks like movement, and this can be a better indicator than semi-transparent layers.
I had to do this several times to get it to this stage - I would snap a picture, download it and layer it for comparison, make more changes, snap another picture, etc. Hopefully, people familiar with the actress's face will now be able to recognize her in the painting. I'm satisfied with it myself - partly because I know that if I do anything else to it, I will only ruin it.
Image size
1012x1820px 1.25 MB
Make
FUJIFILM
Model
FinePix S2950
Shutter Speed
1/26 second
Aperture
F/4.4
Focal Length
15 mm
ISO Speed
800
Date Taken
Apr 23, 2012, 1:32:24 AM
Sensor Size
1mm
© 2012 - 2024 SirGunky
Comments0
Join the community to add your comment. Already a deviant? Log In